I made this fabulous top hat out of chipboard,foam core and cardstock. I used the Graphic 45 Steampunk Spells 12x12 paper pad. I scrap lifted this idea from Anne, http://www.annespapercreations.com/2013/07/graphic-45-steampunk-spells-top-hat.html. Thanks for the idea and instuctions. I am not quite finished embellishing yet but wanted to get it on my blog. I will update with a finished photo hopefully by the end of next week.
This is a scrapbook about my adventures in paper crafts. Mostly scrapbooking but also other items made using paper. Sometimes I use mixed media but not a lot.You can always find Close To My Heart papers,stamps and embellishments on this blog. If you would like to make any of these items or need the materials from Close To My Heart let me know!
Friday, September 27, 2013
Here is a Halloween wreath I made. I first wrapped my styrofoam wreath in some random black & white fabric I had leftover from another project. I used orange and black cardstock and some Tim Holtz Halloween Haunts paper. I used the Close To My Heart cricut cartridge and cut out several different size flower shapes. Then I used a the Close To My Heart wicked stamp and Tim Holtz stamps to stamp on the cardstock flowers. I also inked all the edges of the flowers with Sunset ink from Close To My Heart. Next I embellished my wreath with with some Halooween brads,black and white chevron stripe paper straws from Queen & Co. and I inked those with sunset also. I then added some wooden buttons and some of Tim Holtz accessiries such as the clock key etc... I also made a bow from some black & white skull ribbon from Michaels (not shown).
Wednesday, May 1, 2013
Introducing Dream Pop
On this layout I used two of the patterend cardstocks the grey and the orange along with 2 of the pattern papers and 2 zip strips you find on each pattern paper. On the second photo I used juniper ink on an irresistable letters and used the Artiste cricut cartridge from Close To My Heart to cut out the saying bubble, then I stamped it using a stamp that came with the cricut cartridge using sunset ink. I then went over the words with patina stickles.
On the third photo I used the spinners from Close To My Heart. I did the background using the Chantilly Workshop On The Go Stamp for the backgrounds. I stamped these in juniper,sunset and slate. I then used the Wheel of Life Stamp for the words which I stamped in black.
So there you have it folks my first layout using the new Dream Pop paper!! There are so many cute patterns in this pack it was hard to decide what to use.
Friday, April 26, 2013
This is a foldable frame available from Close To My Heart! I used all Close To My Heart products on this. The paper is the For Always pack with Pacifica cardstock and ink. I cut the papers to fit into the frame. On the center photo I used ink from the Pacifica stamp pad and a dauber to add the color on the bottom strip of paper. I then used a white pen to add the quote on the top corner section, the quote is "To the world you may be just another person, but to me you are the world."
On the bottom photo I ran the Pacifica card stock through my embossing machine with a texture plate from sizzix. I then took a distress tool from Close To My Heart and removed the color of he card stock to show the white core on the embossed pattern. I then cute out the word Love using my cricut and the Art Philosophy cartridge exclusively from Close To My Heart. I also used this cartridge to cut out the flowers on the bottom photo. I inked one of the florwers with Pacifica and rolled them all up to make the flower. If you mist the paper with water a little it is easier to roll into the flower. I used a quilling tool to roll it up and secured the center with liquid glass. I then added a gem to the cneter of each flower. I plan to put photos of my son and husband int the empty sections.
All of the products can be purchased from me on my website: closetomyheart.com/kimberlysharp.
Friday, January 4, 2013
Whooo's Your Valentine? National Papercrafting Month: January 2013
This is the new Valentine Treat kit that you can make yourself with very little effort! Everything you need is included in the kit except ink and acrylic block for only $10 until the end of Jan. but only while supplies last! Already 54% gone, so if you want it hurry and order it by contacting me. You can send me an email or visit my website at http://kimberlysharp.ctmh.com/ I can't wait to receive mine and make these cute treats for my son's class!!
Thursday, November 1, 2012
Monday, September 17, 2012
Halloween Layout (4 pages)
Here are the photos of the 4 page layouts I will be teaching to 3 different meetup groups. On Oct. 6,13 and 27. If you are interested in taking one of these classes let me know. The cost of the class is $15. If you want me to send you the supplies then the cost would be around $20. These layouts are made with products from Close To My Heart. The paper pack is called Moonlight and the embellishments are the Moonlight embellishments. The die cuts are from Cricut cartridge Happy Haunting and Artiste. I also used the Moonlight workshop on the go stamp.
Friday, August 24, 2012
Here is a layout I did using one of Close To My Hearts new stamps, called Love Blooms. I also used our new pigment markers to color the flowers. I used 2 markers to do all the flowers. The paper is from the Close To My Heart limited edition, Dotty For You.
My friend Teddi took these pictures of my son, Tristen looking at the flowers at a local scrapbook store, The Little Blue House.
Fall/Winter Paper from Close To My Heart Layout Class
I went to Indiana to visit my relatives and held a scrapbook layout and technique class at my mom's church. I did my layout in Dakota.
I let all my students choose the paper packs and embellishments they wanted to use. Here is just a few of the layouts some of them did.
We also made a frame from our leftover paper. Here is one of them.
I love how the layouts are the same but using different paper you get a great sense of how vastly you can change the feeling you get looking at them by just changing the materials you use!!
I think the class turned out pretty well for my first one. I hope all of my students will want to do another class with me some time.
I let all my students choose the paper packs and embellishments they wanted to use. Here is just a few of the layouts some of them did.
We also made a frame from our leftover paper. Here is one of them.
I love how the layouts are the same but using different paper you get a great sense of how vastly you can change the feeling you get looking at them by just changing the materials you use!!
I think the class turned out pretty well for my first one. I hope all of my students will want to do another class with me some time.
Monday, July 16, 2012
New Close To My Heart Products
At convention in Dallas this past week we learned that Close To My Heart will have a brand new Cricut cartridge that can only be purchased through a consultant aka ME. This one is called Artiste and coordinates with even more stamps we have. The last cartridge sold a years worth of stock in 3 weeks so to avoid getting yours on back order I am offering a pre order. You can pre order the cartridge which comes with 3 exclusive stamps you can only get with the cartridge and 3 sets of dimensional elements. The price is $99 plus tax and shipping. This cartridge is bound to get the same reviews as it's predecessor Art Philosophy which was voted best cartridge in 2011. So secure your now!!
Not only will that product be available we will also be introducing pigment inks. We are also getting alcohol ink markers, sold in 2's each color will have a highlight shade with it. Also we will be introducing home decor products so your home can showcase your passion for paper crafts and your art work.
Look for the new catalog on August 1. You can see it on my website kimberlysharp.ctmh.com
Not only will that product be available we will also be introducing pigment inks. We are also getting alcohol ink markers, sold in 2's each color will have a highlight shade with it. Also we will be introducing home decor products so your home can showcase your passion for paper crafts and your art work.
Look for the new catalog on August 1. You can see it on my website kimberlysharp.ctmh.com
Wednesday, June 20, 2012
Silly
This page was on our way home from a birthday party. Tristen was sitting in the back with my bff Teddi and was being silly to make her laugh!! Which of course it did! She took these photos of lambie on top of Tristen's head. On this page I don't know what paper this is but I used the Close To My Heart stamp Hope for Japan on the blue circle. For the ribbon I used a CTMH stamp called Blue Ribbon and the letters were a stamp called Classmates Alphabet. On the opposite page I used a stamp from CTMH called You Are to make the square at the bottom.
The Simple Things
Oh, the simple things in life, or things that should be simple!! Trying to teach a boy to go potty is impossible!! After about 5 months of stickers and matchbox car bribes I finally gave up! No more bribery. Then one day Tristen says "Mommy I have to go potty" and he never looked back!! FINALLY potty trained at age 3!!!!
Monday, June 18, 2012
Christmas Card Swap
This is one of the Christmas cards I made using only Close To My Heart products for a Christmas In July Swap. This card features the Around The Block Stamp,Elemental paper pack and red button assortment. The inside of the card says Happy Holidays .
I also made tags for this swap and here is a few of the ones I made.
These were also made with Close To My Heart Products. All of the tags were cut using the cricut and the Close To My Heart Art Philosophy cartridge available only from a Close To My Heart consultant, aka ME!
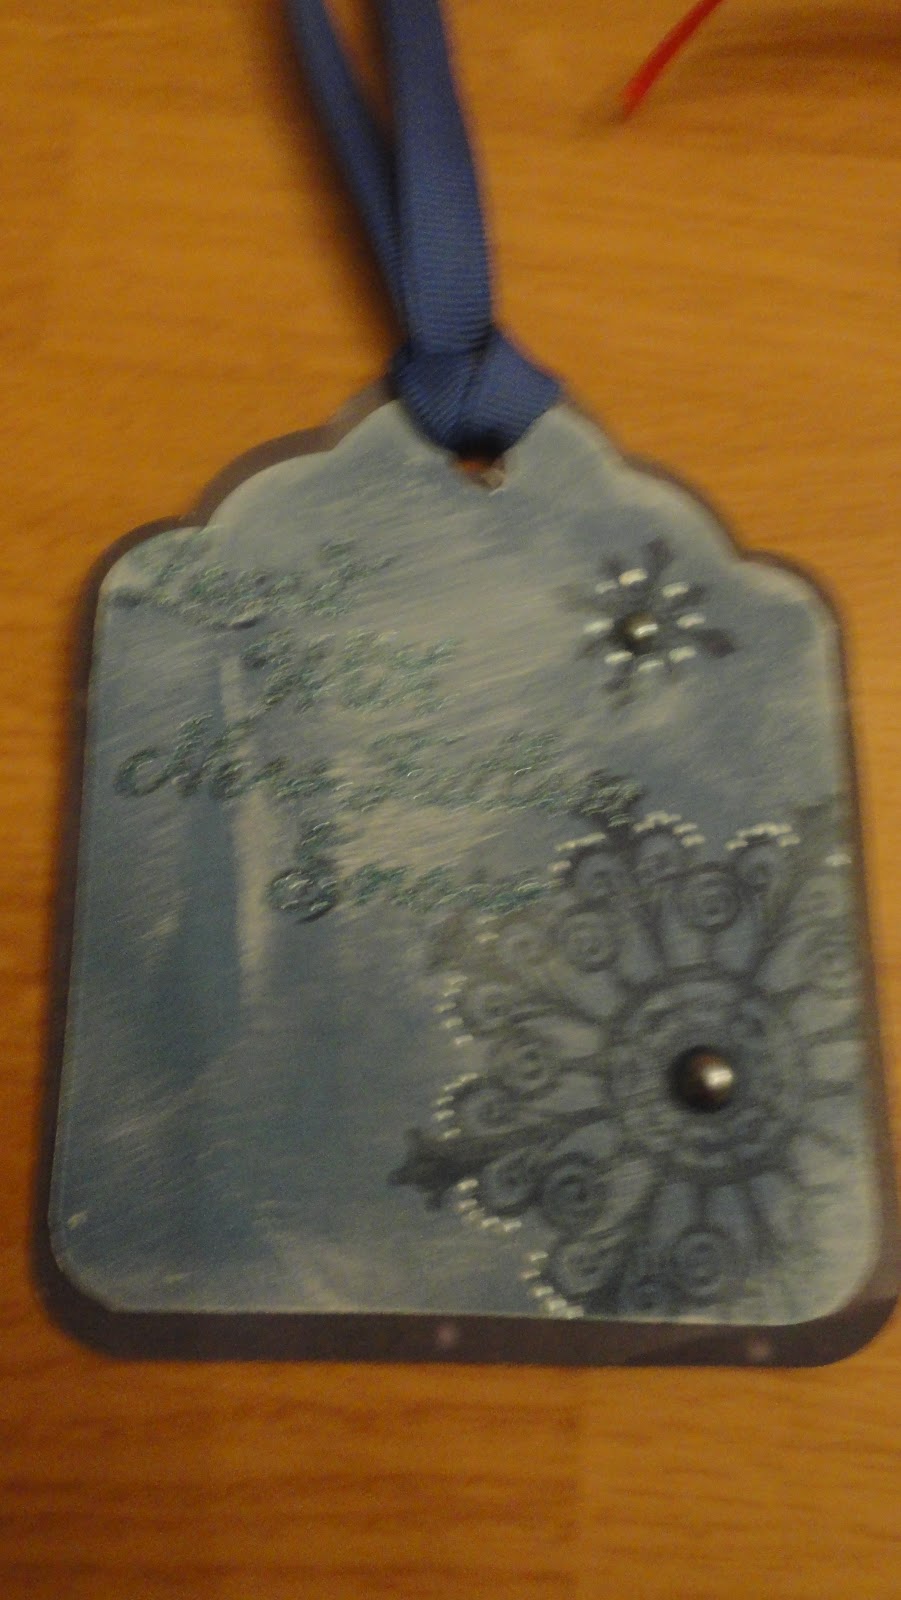
The first tag is using a stamp no longer available for the snowflakes called New Fallen Snow but we do have a new snowflake stamp. The saying on it says "Laced With New Fallen Snow," from the same stamp set. I also used the opaques.
Tag 2: This one is made with trees cut from Olive card stock on the cricut. and I folded them in half with a bone folder. I then glued one side of each one to the other to make this faux honeycomb look. When done with gluing them together I adhered the two unglued sides to the tag. I then added glitter glue,opaques and itty bitty pearls for the ornaments and star.
Tag 3: I again used the super fabulous awesome cartridge for the cricut Art Philosophy. I cut out another type of tree and adhered it to the tag. I then used glitter glue and itty bitty pearls for ornaments.
Tag 4: I used one of the CTMH stamp sets and stamped the star. I then cut it out and used the opaques to add some sparkle. I also used a saying that goes with that stamp. It says "Tis the season to sparkle".
Tag 5: I used a one of the stamp sets from CTMH to create the tag with the date on it. I also used it for the numbers and added opaques for some more bling.
I hope you liked these and maybe it will give you some ideas to use this Christmas.
I also made tags for this swap and here is a few of the ones I made.
These were also made with Close To My Heart Products. All of the tags were cut using the cricut and the Close To My Heart Art Philosophy cartridge available only from a Close To My Heart consultant, aka ME!
The first tag is using a stamp no longer available for the snowflakes called New Fallen Snow but we do have a new snowflake stamp. The saying on it says "Laced With New Fallen Snow," from the same stamp set. I also used the opaques.
Tag 2: This one is made with trees cut from Olive card stock on the cricut. and I folded them in half with a bone folder. I then glued one side of each one to the other to make this faux honeycomb look. When done with gluing them together I adhered the two unglued sides to the tag. I then added glitter glue,opaques and itty bitty pearls for the ornaments and star.
Tag 3: I again used the super fabulous awesome cartridge for the cricut Art Philosophy. I cut out another type of tree and adhered it to the tag. I then used glitter glue and itty bitty pearls for ornaments.
Tag 4: I used one of the CTMH stamp sets and stamped the star. I then cut it out and used the opaques to add some sparkle. I also used a saying that goes with that stamp. It says "Tis the season to sparkle".
Tag 5: I used a one of the stamp sets from CTMH to create the tag with the date on it. I also used it for the numbers and added opaques for some more bling.
I hope you liked these and maybe it will give you some ideas to use this Christmas.
Tuesday, May 15, 2012
May Blog Hop-Yo Yo Flowers
Hi ya'll it's that time of the month again! Time for the Close To My Heart Blog Hop. I am glad you stopped by to take a look at the fabulous yo yo flower technique that we are featuring this month. If you are coming from Tonya's blog; /http://heartandsoulscrappers.blogspot.com/ then you are on the right path.
For this month's technique I chose to do what I and most scrapbookers do the majority of the time, a layout! First I chose the paper, Dotty For You paper pack from Close To My Heart which is available from me for a limited time. They stop selling this paper pack on May 31, this is a great pack, it comes with 24 double sided papers in various prints and colors and can easily be mixed and matched with other papers. I chose it because it is very bright and depicts the attitude of me being happy spring is here.
Next I decided to make my yo yo flowers. I cut out a border from the Art Philosophy Cricut cartridge available only from Close To My Heart. First I made the blue and green one. I used one border to do this one. I scored the border every 1/4" and then folded it along the score lines in an accordian style. When I got to the end I took a needle and thread and stiched along the bottom but not too close to the edge. When I had finished stiching all the way across I cut the string and knotted it. I then pulled the string bringing the paper as close together as possible. I then placed some liquid glass on the end and attached the ends to each other. I then put it down with the side I wanted showing up and put a book on top to hold it in place while the ends dried. For each of the flowers I followed this exact pattern except that I used 2 of the borders and glued them together at the end. On the pink flower I used an edge punch to punch a pattern in it before scoring the paper.
After the flowers were dry I took a 1"circle punch and punched out a piece of paper I wanted to use as the center of the flower. I then used liquid glass to attach the center and placed the book on top again to let it dry. After they were dry I put a brad,button or gem in the center for extra pop.
For the layout I chose to use the smoothie chevron,sweet leaf & lagoon pattern,sweet leaf dots for the first page. I cut the paper as follows sweet leaf dot: 12x5,12x4;sweet leaf & lagoon pattern 12x3;smoothie chevron 10x4 1/4,7x3 33/4. I placed the sweet leaf dots at the top edge and bottom edge and glued them down. Then I placed the sweet leaf & lagoon pattern in the center and glued it down. I then placed the smoothie chevron paper 1/2" from the right side and the bottom an adhered the smallest piece. Then 1/2" from the right side and the top and adhere the final piece of paper. Then I adhered my photos and finally grouped my yo yo flowers clustered in the right hand corner.
For the second page I got 1 1/3" white circles from white daisy cardstock. Then I cut different pieces of paper in the dotty for you paperpack at 1 1/4" circles. I used 16 of the circles. I then glued the patteren circles to the white leaving a small border all the way around. I then cut the smoothie chevron paper beginning with cutting slightly outside the white line on the chevron pattern to make points. I then cut the paper to where it measured 12x3 1/2. I cut the yellow dots paper at 12x1 3.4 and 12x5. I gut the sweet leaf cardstock at 12x3. I first adhered the yellow dots to the bottom and top with the smaller one on the bottom. I then adhered the sweet leaf cardstock under the top yellow piece. Next I adhered the smoothie chevron under the sweet leaf cardstock overlapping the yellow dot paper on the bottom. I then randomly adhered the dots to the page. I even cut some so it looked as though they were going off the page. Be mindful of where you plan to place your photos and don't put the circles there.
That wraps up my layout instructions with the yo yo flower instuctions. Thank you so much for taking the time to look at the many uses of the yo yo flowers. If you need any of the products used in this layout you can contact me or visit my website at www.kimberlysharp.ctmh.com. Now continue on to Cherri's blog at craftwithfeeling.blogspot.com
Hi ya'll it's that time of the month again! Time for the Close To My Heart Blog Hop. I am glad you stopped by to take a look at the fabulous yo yo flower technique that we are featuring this month. If you are coming from Tonya's blog; /http://heartandsoulscrappers.blogspot.com/ then you are on the right path.
For this month's technique I chose to do what I and most scrapbookers do the majority of the time, a layout! First I chose the paper, Dotty For You paper pack from Close To My Heart which is available from me for a limited time. They stop selling this paper pack on May 31, this is a great pack, it comes with 24 double sided papers in various prints and colors and can easily be mixed and matched with other papers. I chose it because it is very bright and depicts the attitude of me being happy spring is here.
Next I decided to make my yo yo flowers. I cut out a border from the Art Philosophy Cricut cartridge available only from Close To My Heart. First I made the blue and green one. I used one border to do this one. I scored the border every 1/4" and then folded it along the score lines in an accordian style. When I got to the end I took a needle and thread and stiched along the bottom but not too close to the edge. When I had finished stiching all the way across I cut the string and knotted it. I then pulled the string bringing the paper as close together as possible. I then placed some liquid glass on the end and attached the ends to each other. I then put it down with the side I wanted showing up and put a book on top to hold it in place while the ends dried. For each of the flowers I followed this exact pattern except that I used 2 of the borders and glued them together at the end. On the pink flower I used an edge punch to punch a pattern in it before scoring the paper.
After the flowers were dry I took a 1"circle punch and punched out a piece of paper I wanted to use as the center of the flower. I then used liquid glass to attach the center and placed the book on top again to let it dry. After they were dry I put a brad,button or gem in the center for extra pop.
For the second page I got 1 1/3" white circles from white daisy cardstock. Then I cut different pieces of paper in the dotty for you paperpack at 1 1/4" circles. I used 16 of the circles. I then glued the patteren circles to the white leaving a small border all the way around. I then cut the smoothie chevron paper beginning with cutting slightly outside the white line on the chevron pattern to make points. I then cut the paper to where it measured 12x3 1/2. I cut the yellow dots paper at 12x1 3.4 and 12x5. I gut the sweet leaf cardstock at 12x3. I first adhered the yellow dots to the bottom and top with the smaller one on the bottom. I then adhered the sweet leaf cardstock under the top yellow piece. Next I adhered the smoothie chevron under the sweet leaf cardstock overlapping the yellow dot paper on the bottom. I then randomly adhered the dots to the page. I even cut some so it looked as though they were going off the page. Be mindful of where you plan to place your photos and don't put the circles there.
That wraps up my layout instructions with the yo yo flower instuctions. Thank you so much for taking the time to look at the many uses of the yo yo flowers. If you need any of the products used in this layout you can contact me or visit my website at www.kimberlysharp.ctmh.com. Now continue on to Cherri's blog at craftwithfeeling.blogspot.com
Monday, May 14, 2012
Sunday, April 15, 2012
April Close To My Heart Blog Hop
For this month's blog hop we are high lighting the Layering technique on page 33 of the Close To My Heart spring/summer idea book. This blog hop is a great big circle so you can start wherever you want and continue through to see all the fabulous artwork incorporating this technique.
We would love to see what you’ve created using this month’s technique, please visit our challenge blog at http://technicallyterrific.blogspot.com where you can share your project and be entered in a chance to win great prizes. You will also find a listing of all participants and their blog addresses if you should get lost or want to reference a blog along the way. Let’s get started!
If you are coming from Tabbi's blog http://stuckonscrappin.blogspot.com/you are on the right track,
I created a card using the Stella paper pack and a colonial white card base. I used the Art Philosophy cricut cartridge only available from Close To My Heart. I cut a 3 1/2" frame in the pink paper, I cut the shape on pg. 51 of the Art Philosophy book in the left side of decorative layer. I then cut a 3 1/4" from the same page on the right side of decorative layer in the blue paper. I cut the Cocoa cardstock for the background of the card base. I then cut a 31/4" circle from the cocoa cardstock 1/8" down and 1" from either side of the card. I then adhered the lagoon piece of patterned paper onto the card base. Next I adhered the cocoa cardstock to the card.front. Next I adhered the sunset piece of patterned paper to the card surrounding the cutout. Next I placed a large silver shimmer brad in the center of the lagoon piece of paper.
On the inside of the card I cut the same shape from page 51 of the cricut cartridge. I cut the sunset piece at 3" and the olive piece at 2 1/2". I placed the olive piece 1/4" from the left side of the card and down 1/4". I placed the sunset piece 1" from the right side and 1/4" down, overlapping the olive piece. I placed a small shimmer brad in the center of each of these.
Next I stamped in sunset on the lower right hand corner the first part of my sentiment, I chose one from the Just A Number stamp set on page 110 of the spring/summer idea book. I chose the saying Inside an older person is a younger person...wondering what happened. I stamped the last part of the saying on a piece of lagoon patterned paper 3/4" x 3" in the lower left corner on the inside of the card. I also rounded the corners of thee lagoon paper. I hope you enjoy using this technique in your future creative endeavors.
Thanks for stopping by. For more artwork using this technique continue on to Ann Marie's blog at http://scrapsanonymous.blogspot.com/. Happy Hopping!
Friday, April 13, 2012
Pemberly Cards for Sassy Scrappers group
This card was made with the Pemberly paper pack from Close To My Heart, the February stamp of the month, Potential; Just A Number stamp and Licorice Opaques. You can get all these items from my website.
The next card is a flower pot card made again with the Pemberly paper pack and the January stamp of the month, Pemberly workshop on the go stamp, card word puzzle stamp set.
Monday, April 2, 2012
Memory Game
I made this cute little memory game for Tristen. I created it with a Close To My Heart My Creations Cube. I covered it in the paper from Close To My Heart Elemental paper pack. I also used a dimensional element from the banner set. I inked the dimensional element and glued it to the top. I also used to brads to secure it. I used stamps from several different sets that are from Close To My Heart and colored them with Copic markers. Then I wrote on each one what it was. Tristen and I tried it out, needless to say he is still a bit young for this. He just wanted to throw the pieces around so we will try it again in the future!
Play Date Layout
I used Typeset paper pack from Close To My Heart on this layout. I also used some cutouts from the Cricut that I colored with Copic markers.
Subscribe to:
Posts (Atom)